How to Wire LED Ground Lights

Wiring LED ground lights is much more difficult than wiring downlights especially when they're being installed outdoors. You need to ensure that the ground lights are connected safely and securely while also maintaining a resistance to potential water ingress.
Colour change ground lights have four wires, while single colour ground lights such as warm or cool white have two wires. High powered, proper ground lights are mainly wired in series and require a constant current supply. Wiring colour change ground lights in series is easier than to do than wiring in parallel as you wire them in one straight row, with a beginning and an end; no loop.
Decking Installations
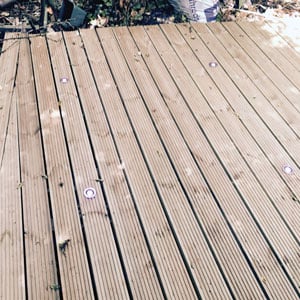
If you're installing them into decking then you'll be able to access the wires from below, similar to a downlight installation, where you'd be able to access them through the floor boards. As they're still being installed outside you'll need to make sure that the cable connections are water tight otherwise your installation won't last the cold, bleak winter months.
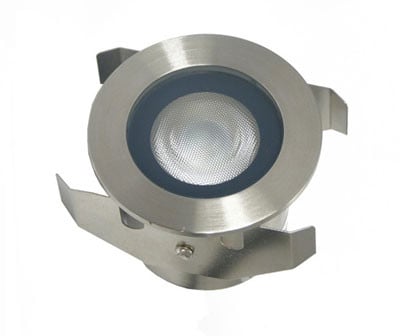
Here's some images showing how our CH60RGB colour change ground lights (shown above) look when installed into decking:


Stone or Concrete Installations
Installing any electrical product into the ground is always going to be more difficult as you can't access the cables as easy. First you'll need to install some conduit so that the cable can be thread through and get buried underground. Conduit will also help to shield the cable from the weight of the materials and offer protection from water ingress.
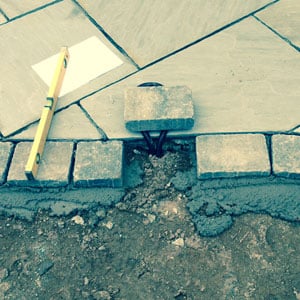


For stone or concrete installations you'll need an installation tube, used in the images above. If you're fitting the ground lights into concrete the tube can be set directly into the concrete. If you're fitting them into stone blocks you'll need to cut a hole into the stone using a special hole saw and place the tube into the hole, the installation tubes for these lights require a 50mm hole. The tubes can then be firmly secured using cement when you're ready.
Once the tube is in place you can easily insert and pull out the ground lights for installation; maintenance. The conduit can then be fed in and out of the tube using the holes provided. If you use 20mm conduit with male ends, they will fit securely in place with the lock nuts.
One of the biggest problems you'll face with this type of installation is, that unless you're doing all of the building and electrical work yourself, you'll find that you have to do certain parts of the installation in stages and you'll most likely be waiting a while for the builders to fit the stone work and for the cement to set. Project management, communication and making sure you've got all of the components ready, when you need them is essential.
Feeding the cable through the conduit can be difficult especially if you're placing them in a round or oval shape rather than in a straight line. I'd recommend putting a feed through cable or some string in place before the cement is laid. You could use an off-cut of cheaper cable which will allow you to tape up the actual cable you're using and drag it through the conduit.
The actual cable you'll use to wire the lights will come from the lights themselves as they are pre-wired with a 3 metres of input and 3 metres of output cable which should be ample for any installation. You'll find that you need to cut off most of this cable as you'd essentially have distances of 6M (3M + 3M) between each light which is way to far and would add additional distances contributing to potential 'Volt Drop' woes.
Many inferior ground lights have cable gland entries which are not as good as factory fitted cables. During winter and summer months the cable glands can expand and subtract in size and will eventually cause water ingress. The last thing you want with an installation like this is to have to keep repairing it, especially in winter.
Ground Light Positioning
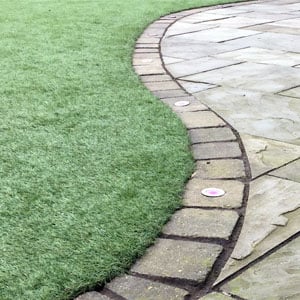
There is no standard recommendation for positioning or spacing distances of ground lights, for this installation we went with 1 metre distances from each light which worked out perfectly. It provided a sufficient lighting effect and didn't have any big gaping gaps between the lights.
Ground Light Wiring
Once the conduit has been fed through and connected to each installation tube using the connectors and lock nuts, the stones can be positioned onto each one and you can start considering the wiring. Here is a diagram showing what you need to do:


As these lights are wired in series you need to connect them all in one straight line from your control box to the first light, then to the second light and so on. The maximum number of lights in a single row is ten due to potential 'Volt Drop' issues. However, many more lights can be added by using additional receivers or amplifiers, please contact us for further advice. The four wires from the end light are all terminated together using a terminal block provided.
Cable Connectors
No matter if you're installing indoors or outdoors our UY2 are ideal for connecting the wires. As the space in the installation tubes is very tight, the UY2 connectors are very small. They are also gel sealed which offers IP65 resistance to water on their own.


To finish off the installation I'd recommend filling the installation sleeves with resin gel. This will offer a third level of protection. The last thing you want is to get any water into the lights as it could cause permanent damage. Combine the two packs together to create the gel and pour it into the tubes.
Power Supplies And Controls
If you're installing RGB colour change lights you're going to have an LED driver and a controller or receiver. It's best to put these inside a control box as this will store them safely and neatly, offer protection from live terminals and & allow you to have secure cable glands for your mains input and output to the lights. The control box can be stored indoors or outdoors.
If you use one of our SR-1009FA3 constant current 350ma receivers you'll also need a constant voltage LED driver to power it. The receiver has a 350ma output which the lights needs but requires a 12V, 24V, or 36V DC input which comes from the LED driver. For this type of application its better to use an LED driver with a higher voltage especially in longer runs otherwise you'll experience 'Volt Drop' issues. This is when your voltage declines over the run of the cables due to resistance in the copper. If you use a 12V supply, loosing just a few volts over 10 metres of cable can cause your lights not to work properly as they're not receiving enough power.
To control the lights we have a selection of controllers which include a handheld remote control, wall controller or you can control them via a smart phone using our LED Wi-Fi controller. Alternatively you can use a combination of all three. This system also allows you to control separate runs of LED tape and other LED lights all on the same system, allowing you to control everything independently or collectively from just one remote control. Each lighting zone requires an additional receiver which are available in constant current or constant voltage versions.
A constant voltage receiver can be used for controlling colour changing LED strip tape.
Connecting from the Control Box
The output from the control box is going to be a 4 core cable, this will need connecting to the first light using the cable that is factory fitted to the light. If you use an outdoor rated ABS enclosure, UY2 cable connectors and resin gel you can ensure triple protection. The image below shows the control panel which is IP65 rated, with a hinged door. With cable glands that are used to feed the wires through the enclosure. Then fed through the conduit and connected with junction boxes with the connectors and more of the handy UY2 IP68 gel connectors.


The control box can then be stored indoors or outdoors, somewhere out of the way and the best location between your mains voltage and the installation.
The Final Result


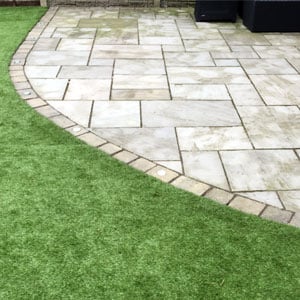
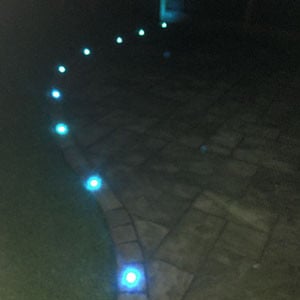

Not the easiest of installations, but with a bit of planning and hard work you can achieve great results that will last for years to come. Providing a multitude of colour changing options to brighten up your outdoor space.